Standard Hybrid Classroom with Zoom Rooms
Before you Start
Please visit our classroom overview for information on available technology in our rooms. You will need a computer to connect to one of our classrooms.
How to Present
Step 1: Touch Screen to Continue.
Step 2: Select Presentation:
-
USB-C: Select if connected to USB-C Cable.
-
HDMI: Select if connected to HDMI Cable.
-
Main Mersive: Select if wirelessly presenting via Solstice.

Presentation Audio Options
-
Mic is Active – mute/unmute classroom microphone.
-
Speakers On – mute/unmute/control speaker volume.
-
Projector Mute – mute/unmute presenting to projectors.
Using the Camera
Step 1: Select Camera.
Step 2: Adjust Camera.
-
Tracking on: start presenter auto tracking. Please note camera tracking will only follow one presenter at a time.
-
Tracking off: stop presenter auto tracking.
-
Camera Presets: select preset camera views.
-
Camera Directional Controls: manually adjust camera angles (left, right, up, down).
-
Zoom In: Zoom in camera.
-
Zoom Out: Zoom out camera.

Step 3: After camera is adjusted, select Presentation to return to the main menu.
Zoom Rooms
Zoom Rooms is a physical conference room software that makes starting or joining a meeting simple and seamless. You can start a Zoom Meeting with just a tap of a button on our touch panels. With Zoom Rooms, you can join meetings wirelessly, share content effortlessly, and utilize our classroom technology such as cameras, microphones, and speakers.
How to Use
Step 1: Select Zoom on the touch panel.
-
New Meeting: start new meeting.
-
Join: enter Meeting ID.
Please note if joining a meeting, admit classroom as participant and promote to co-host on your computer. Camera/Microphone/Speaker will automatically connect.

Zoom Rooms Menu

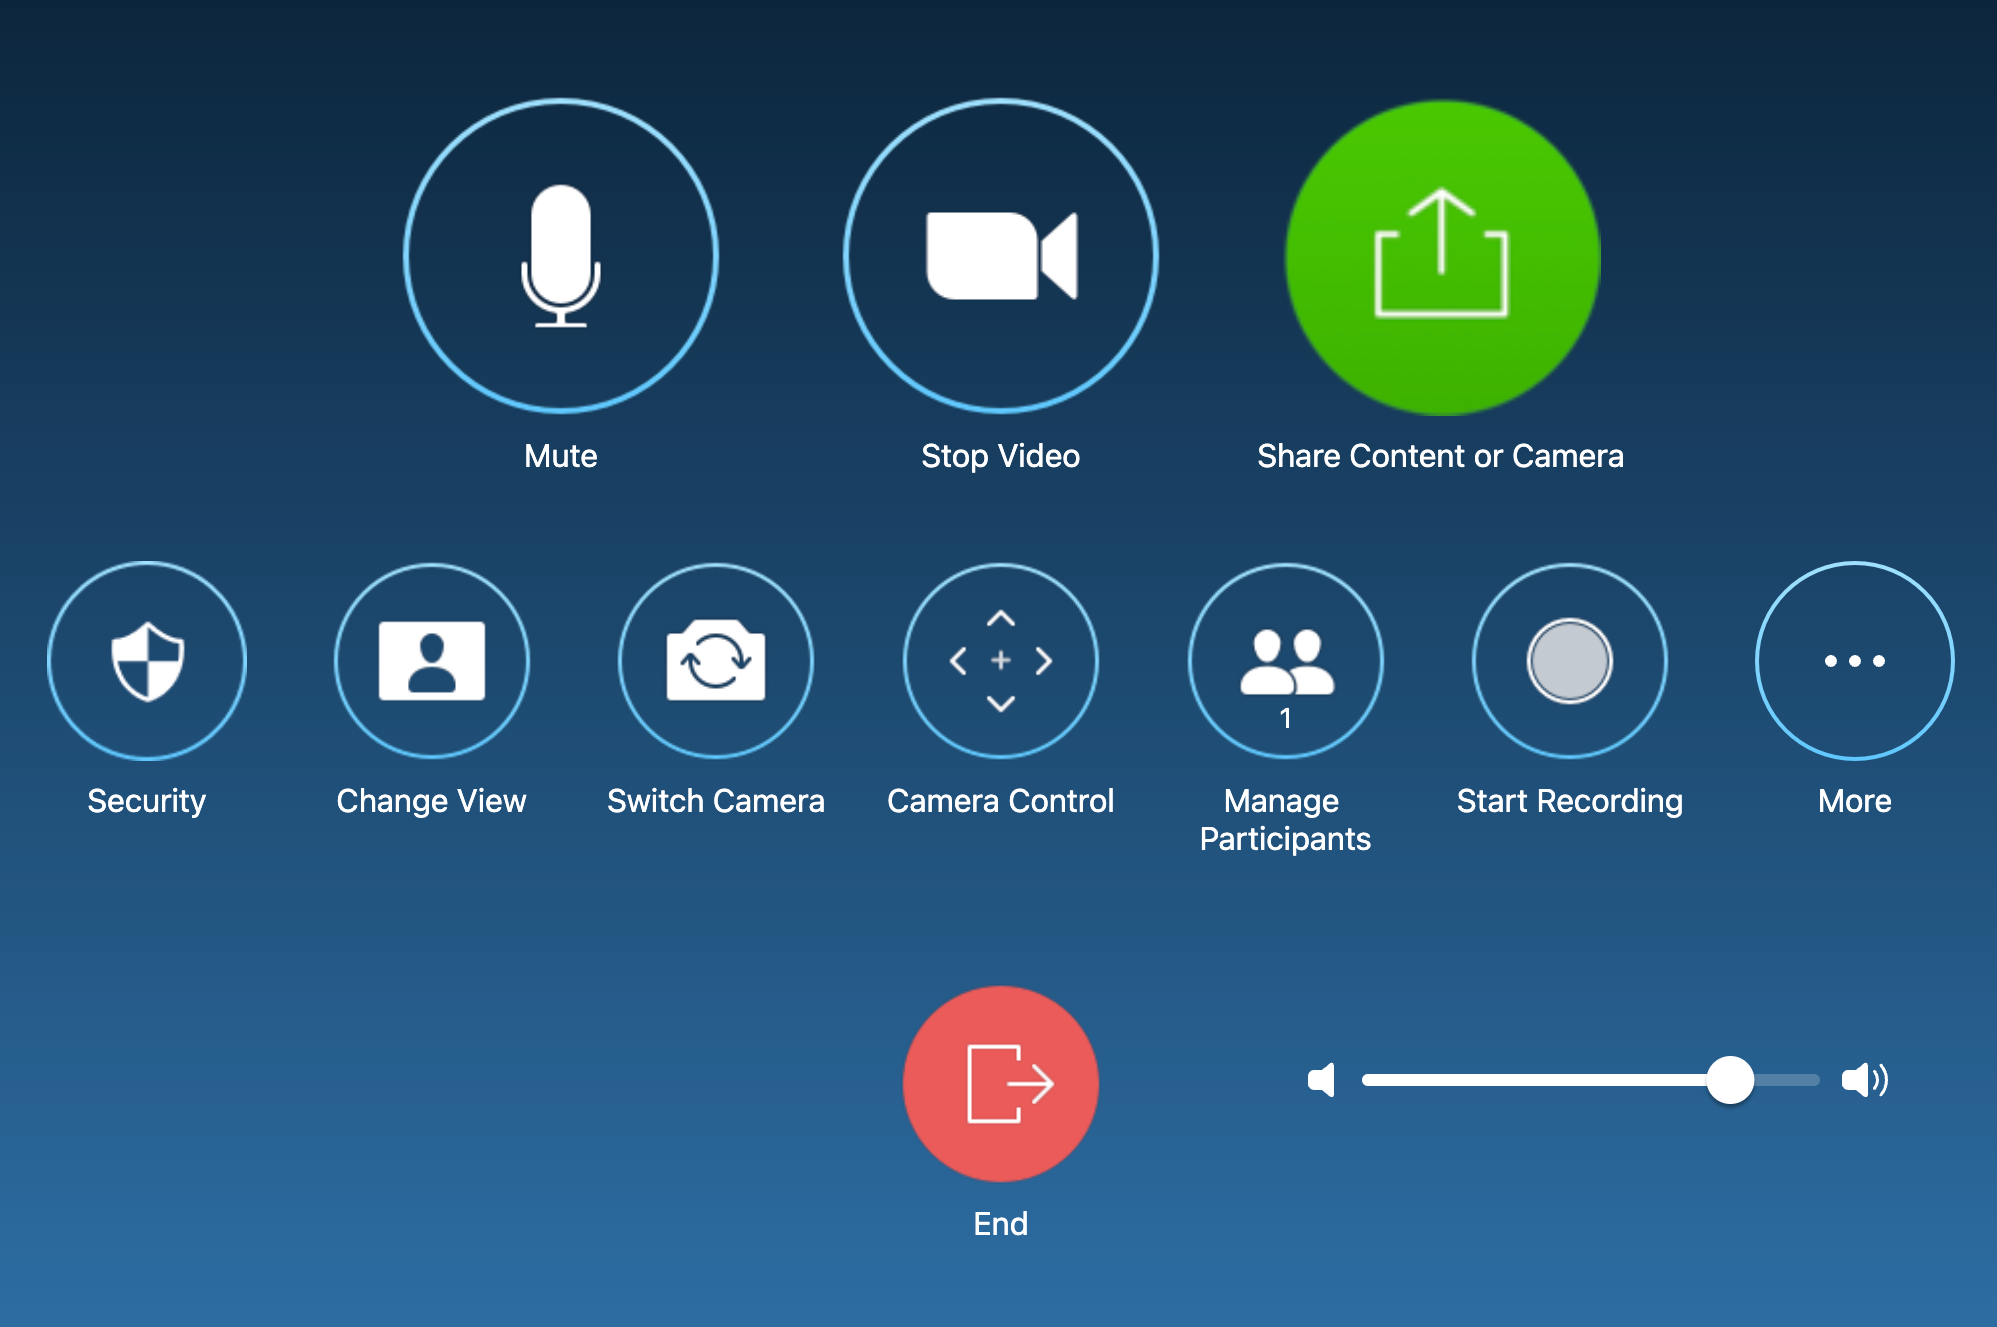
- To Mute/unmute room microphone select Mute.
- To Start/Stop room camera select Stop Video.
- To Record select record and enter email address.
- To Allow Participants to share, select Security.
- Under Allow Participants to, click the toggle next to share screen. Once selected, click Done.
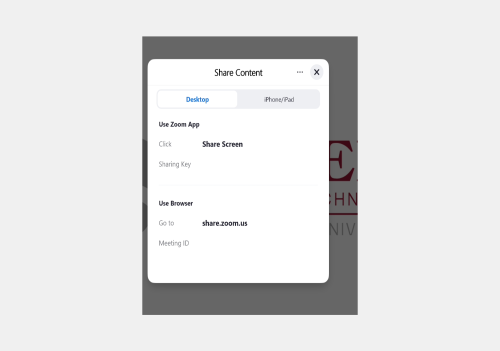
- To share content from a computer, select Share Content or Camera.
- A share key will be generated. Select Share on the Zoom Desktop Client on the computer and enter the Share Key or Meeting ID.

Teams
Step 1: Select Zoom on the touch panel.
Step 2: Select Teams and Enter the Meeting ID and Passcode of the Teams Meeting you are joining. Please note you will be entered in the meeting once the host admits you.
- Note: If you are the host of the Teams Meeting, you must start the meeting via your computer first before joining through the touch panel. When joining the meeting on your computer, select Don't use Audio.

- Note: To share your computer screen via Teams, you must join the meeting on your computer. Within the meeting select Share and Screen. If you would like to share a specific file, please open the file on your computer, select Window, and choose the option that previews the file you would like to present.


Steps to Exit Zoom Rooms on the Touch Panel
Step 1: Touch the top of the screen and select the Home Icon.
Step 2: Select Presentation.

Using Zoom with a Computer
Please Note Camera, Microphone, and Speaker name vary from room to room.
Step 1: Connect your computer to the USB-C cable on podium.
Step 2: On the touch-panel click Presentation and select Podium USB-C.
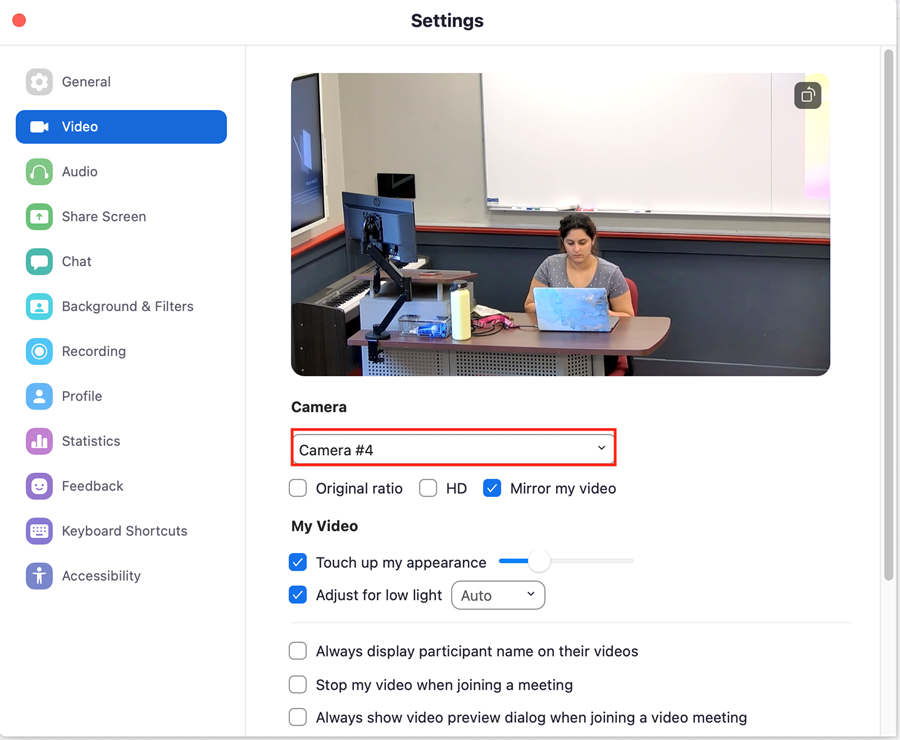
Step 3: Open Zoom on your computer and select the Settings Icon on the right-hand side.

Step 4: Under Video, select classroom camera.
Please note you will see a preview of the room once the right camera is selected.

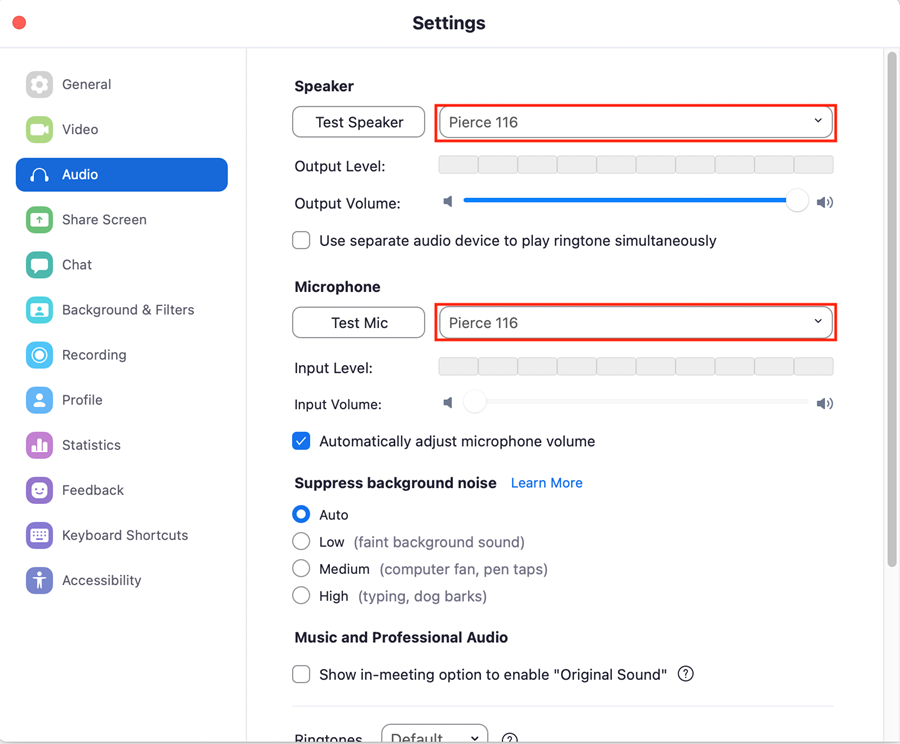
Step 5: Under Audio, for microphone and speaker select classroom microphone and speaker.
Please note you can test the microphone and speaker to ensure the right settings is selected.

Step 6: Close Settings and Join your Zoom Meeting.
FAQs
Why can't I see my computer on the display?
- Make sure cables are secured on podium.
- Make sure cables are not damaged, if they are please contact Client Support Services at support@stevens.edu or 201-380-6599.
- Please make sure your laptop is set to Duplicate mode (PC setting) or Mirror display (Mac setting).
Why can't I hear my computer audio from the speakers?
- For USB-C and HDMI, make sure the audio cable is securely connected to laptop and podium.
- Check audio settings on laptop to see if classroom speakers is selected when using HDMI.
Why can't I connect to the camera?
- Please make sure you are connected to the podium using the USB-C cable. Camera does not work with HDMI.
Why can't I connect to Solstice Wireless Projection?
- Please make sure you connected to the Stevens network, Solstice is available to Faculty, Staff, and Students.
- For iPad users, please make sure you have selected Screen Mirroring option.
- Please make sure you are typing in the correct four-digit key code, a new code is created every time you are disconnected.
Who do I Contact for Rooms Issues?
- For all technology issues or a laptop adapter loan please contact Client Support Services at support@stevens.edu or 201-380-6599 for immediate assistance.
- Please contact classroomissues@stevens.edu for all furniture related issues or to have markers replaced and whiteboards cleaned.
Seating Charts
To view seating charts for classrooms, click here.
Experiencing an issue or need additional support? Contact our OneIT Team by