Continuing Student Onboarding in Workday
This user guide will walk a student through completing the Continuing Student Onboarding tasks in Workday.
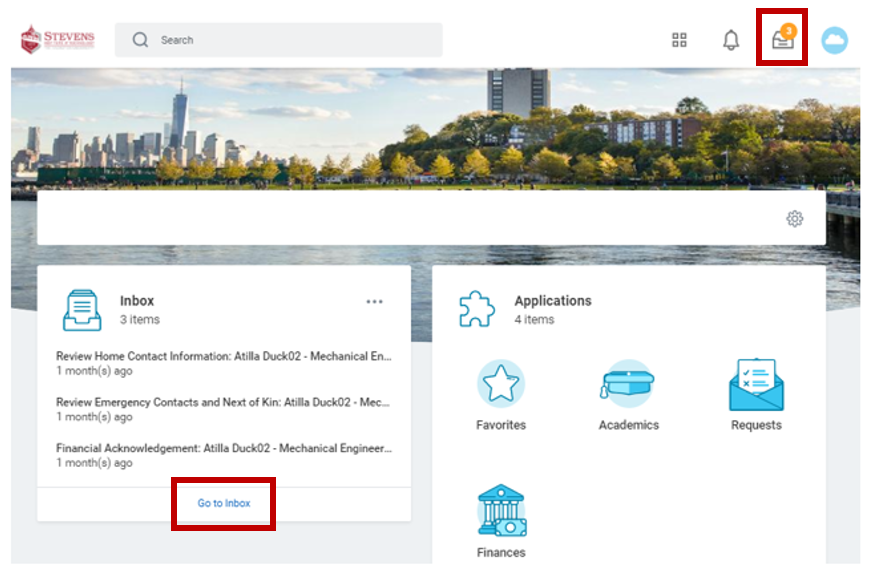
Step 1: From your workday homepage, select Inbox Icon.
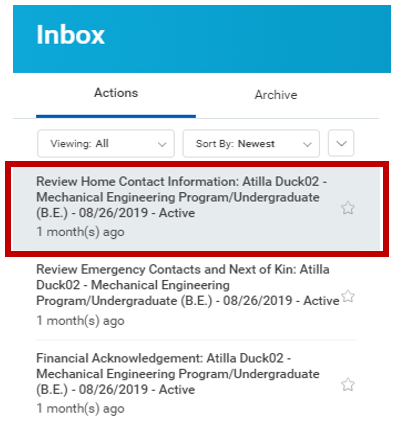
Step 2: From your inbox – Select Review Home Contact Information
Step 3: Review your current Home Contact Information. If information is accurate, select Approve to continue onboarding. If you need to make any changes, select Edit and continue to Step 4.

Step 4: Select – Pencil icon to edit current information. Select – X icon to delete current information. Select – Add to add additional information. Use the Search Address box to search for your address. Once selected, the address will pre-populate in the remaining address fields. Once finished, select Submit

Step 5: Select Approve

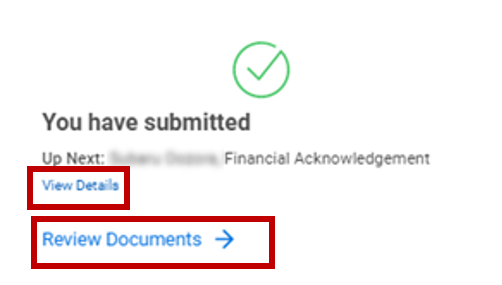
Step 6: For additional information, select View Details. To continue onboarding, select Review Documents.
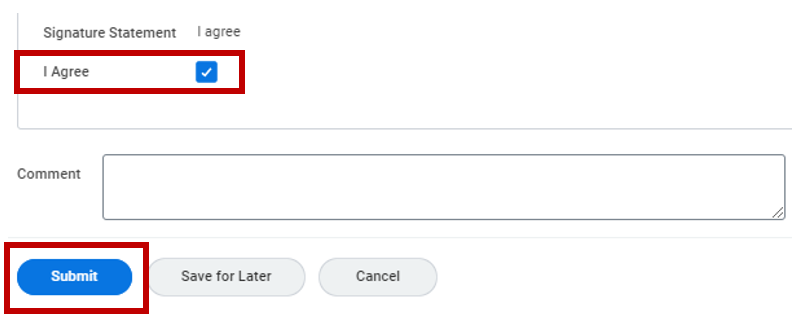
Step 7: Read all Financial Acknowledgement Agreements. Select I Agree box – Select Submit
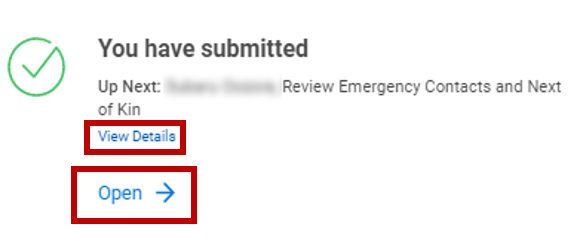
Step 8: For additional information, select View Details. To continue onboarding, select Open.
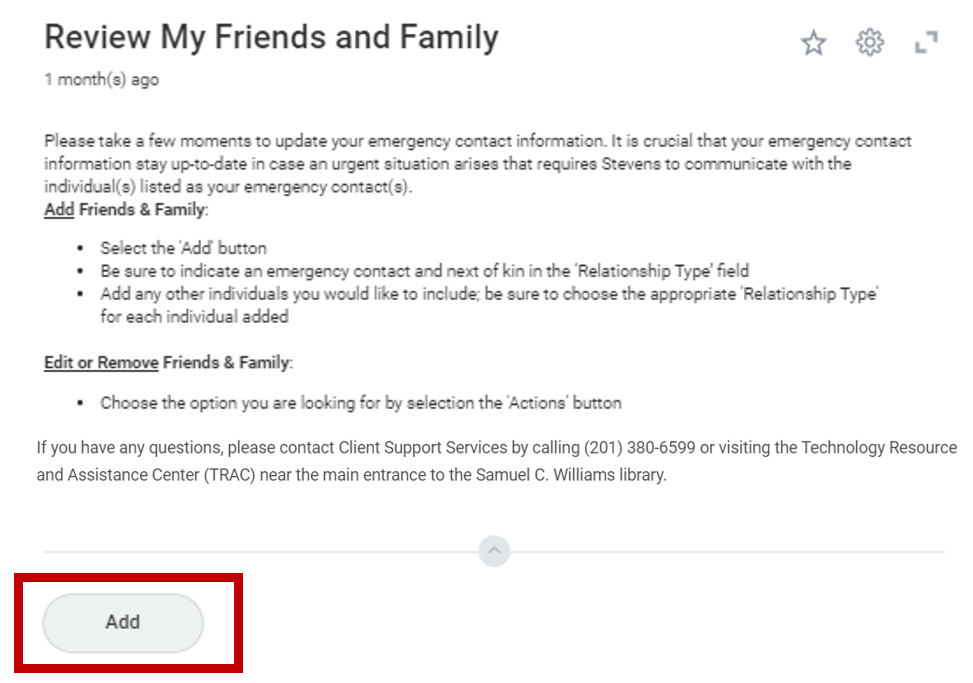
Step 9: Review My Friends and Family instructions and information. To enter Friends and Family information – Select Add
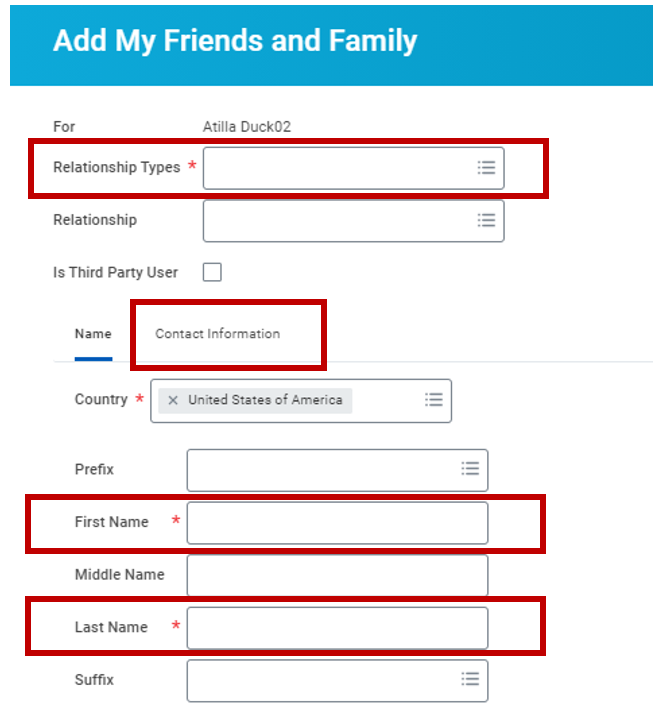
Step 10: Enter information in fields marked with an asterisk. Select Contact Information Tab
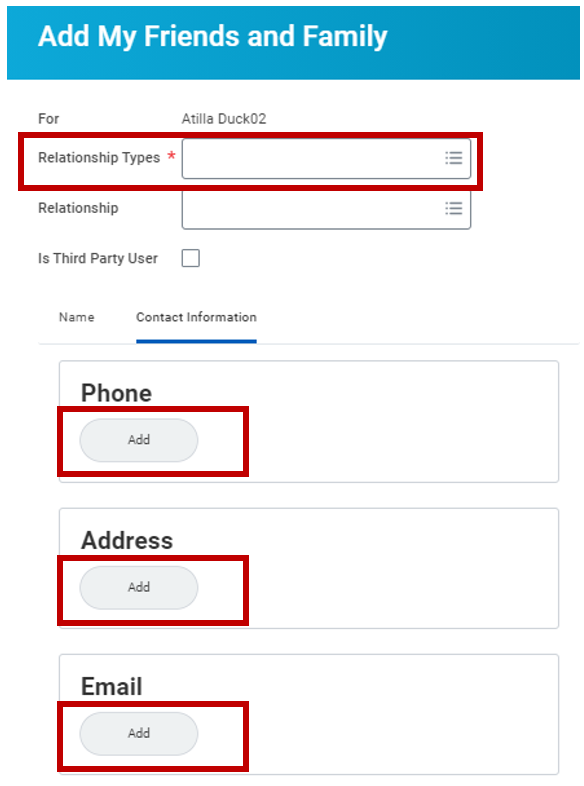
Step 11: Select Relationship Type and enter additional information by selecting Add. Select Done
Step 12: Select OK

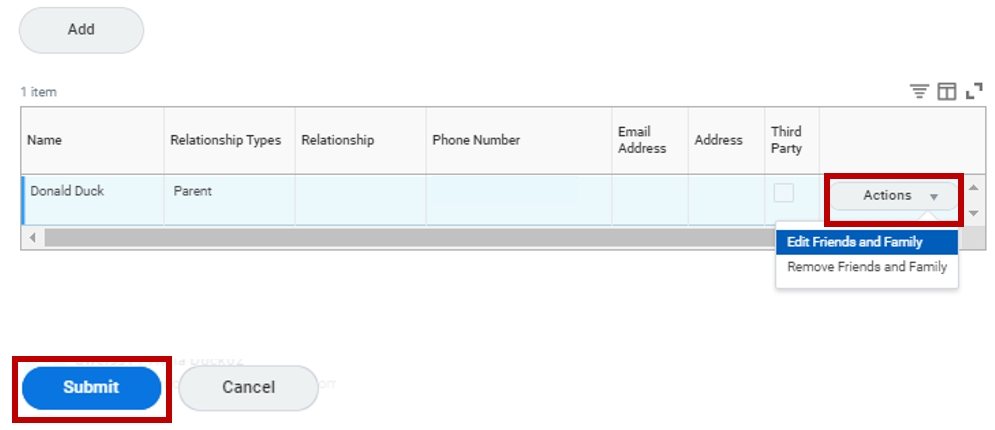
Step 13: Review added Friends and Family information. Select Done

Step 14: Review Friends and Family Contact Information. To edit or remove contacts, select Actions. Select Submit.
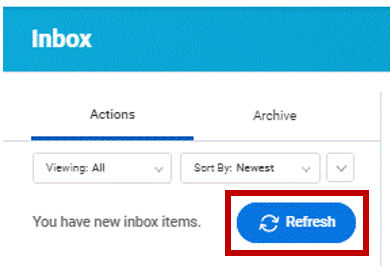
Note: You will automatically be redirected to your inbox that will have two more onboarding tasks to complete. If you do not see Review Student Handbook, and FERPA Acknowledgement task to complete, select the refresh button.
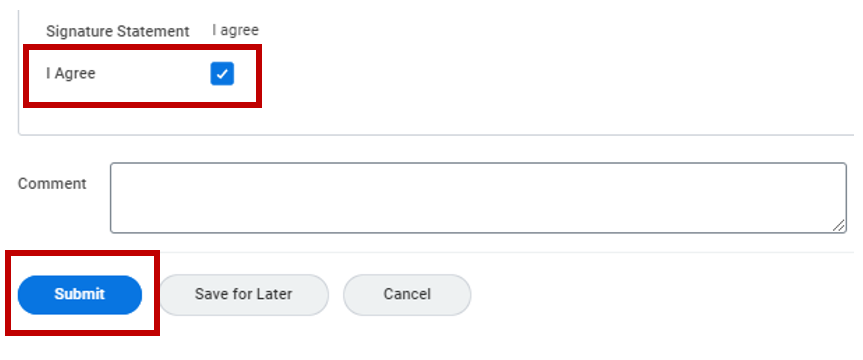
Step 15: View the Student Handbook by selecting the hyperlink in the instructions field. Select I Agree box and Submit to continue onboarding.
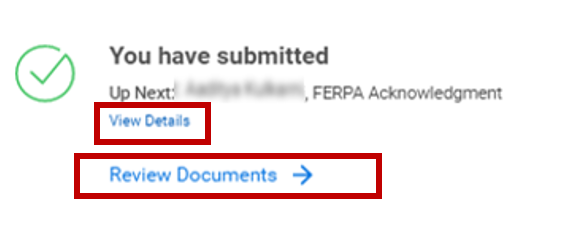
Step 16: For additional information, select View Details. To continue onboarding, Select Review Documents.
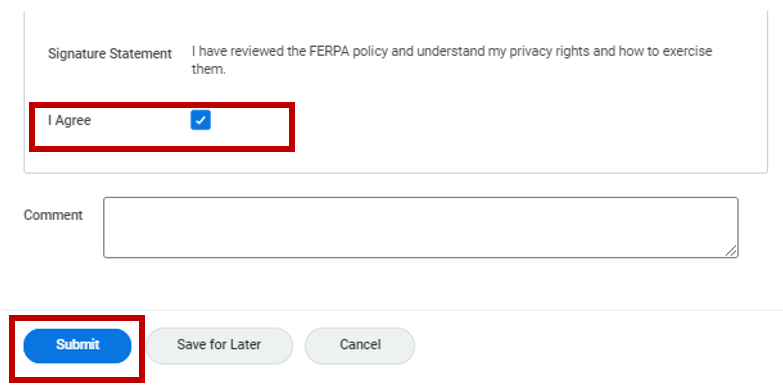
Step 17: Read FERPA Privacy Rights Policy – Select I Agree box – Select Submit
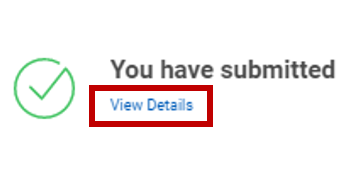
Step 18: Select View Details
Note: If you are an international student, continue onboarding on the next page.
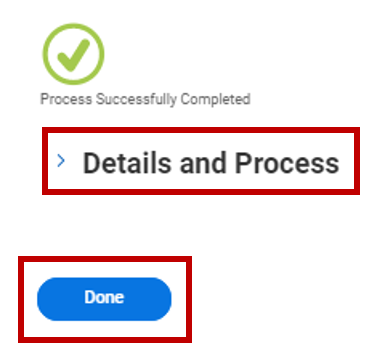
Step 19: To view all onboarding tasks completed, select Details and Process. To go back to the workday homepage, select Done.
Step 20: Review instructions and verify citizenship and visa information is up to date. If no changes are needed, select Submit.

Step 21: Select View Details

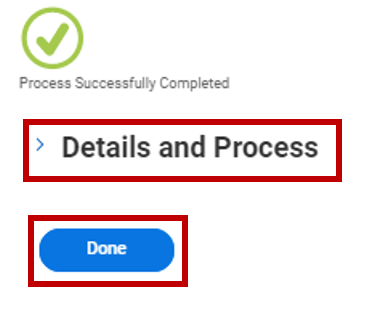
Step 22: To view all onboarding tasks completed, select Details and Process. To go back to the Workday homepage, select Done.
Experiencing an issue or need additional support? Contact our OneIT Team by