How to Send a Campaign to Internal and External Audiences in Emma
This guide will walk you through the process for sending the same campaign from your internal and external subaccounts.
Before You Start:
- External emails MUST have opt-out info.
- Internal emails do not require opt-out info because all recipients have the stevens.edu domain address.
- Some departments have two sub-accounts to accommodate the need to send campaigns to both internal and external audiences.
- If you need to send the same campaign to both internal and external audiences, you will have to create two campaigns and deploy them separately.
- To streamline the process, you may share a campaign from an internal subaccount to an external subaccount (Method 2). Note: You will need to add opt-out information to the external campaign before being able to deploy it.
There are two methods to achieve this goal:
Method 1 – Manually Copy the Content from One Campaign to Another
This solution is for emails with a smaller amount of content. While this may sound labor intensive, Emma allows you to cut and paste content without causing format issues.
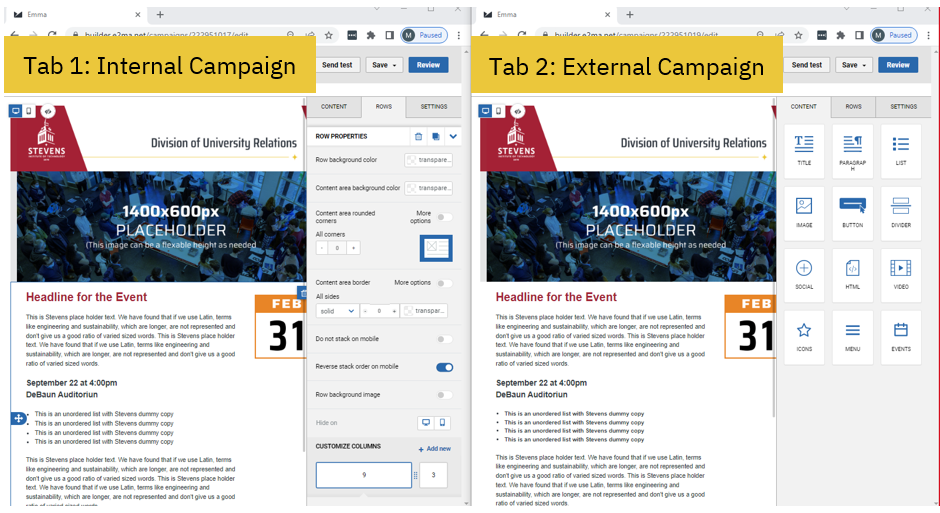
Step 1: Once you have finalized and saved all the content in the internal subaccount campaign, duplicate your browser tab or window. You should now be viewing two of the same tabs or windows of the editor screen in Emma.
For this example, you will see tab 1 as the internal campaign you have finalized and tab 2 as the new external campaign you would like to copy content to.

Step 2: In tab or window 2 navigate to the external subaccount you would like to create the new campaign in. From there create a campaign with one of your templates, this will ideally be the external version of the template you used in the internal campaign you are copying.
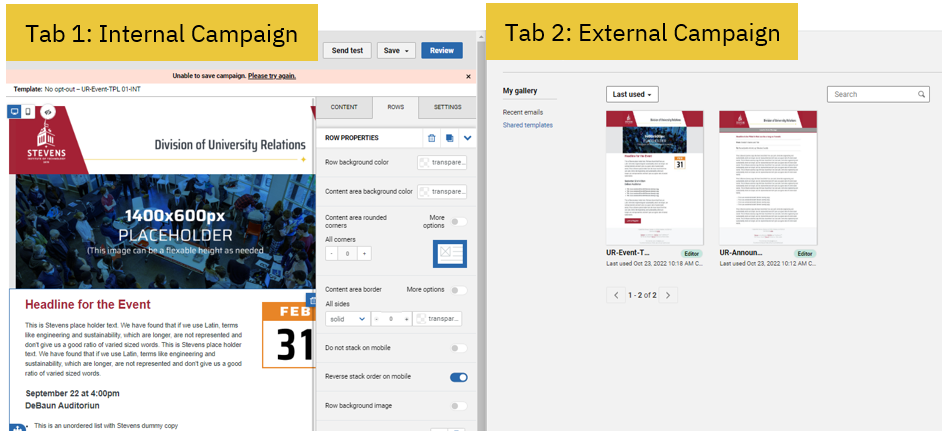
Step 3: Copy and paste the content from tab 1 (internal campaign) to tab 2 (external campaign). Be sure to save your campaign once you have copied all the required content.
Step 4: Follow your department processes for getting approval to deploy the two campaigns to the intended audiences.
Method 2 – Share the Campaign from the Internal to External Subaccount
This solution is for campaigns that contain a considerable amount of content, such as newsletters including various images and sections.
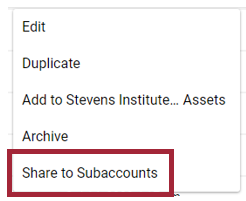
Step 1: In your internal subaccount select the Campaign page then and under Drafts select the arrow to the right of the campaign you would like to share.

A drop-down menu will appear, and you will then click on Share to Subaccounts.
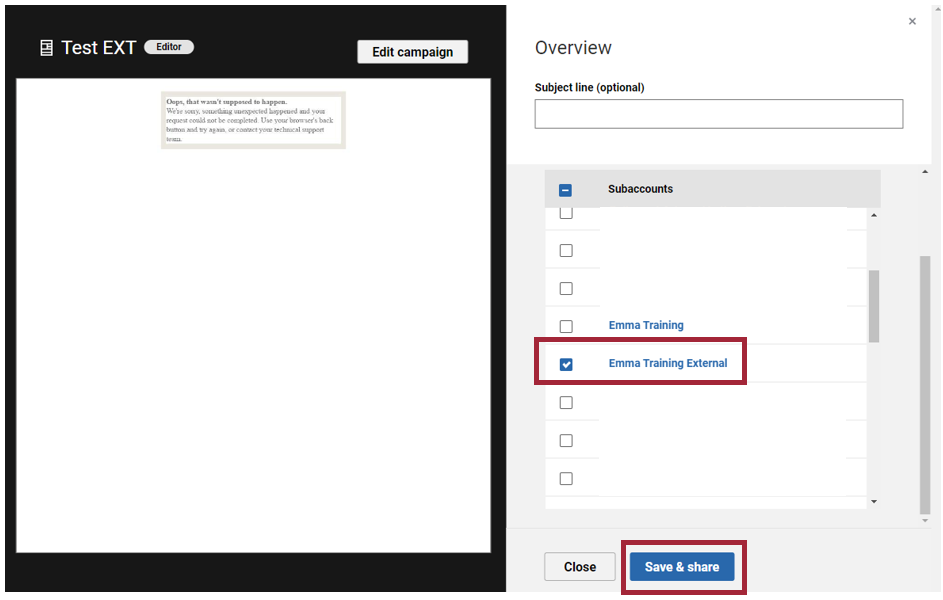
Step 2: Another page will appear. Click on the checkbox next to the Subaccount you would like to share the campaign with. Then select Save and Share at the bottom.
Step 3: Navigate to the External subaccount you shared the campaign with. Select the Campaigns page and then select the Shared tab. There, you will see the campaign you shared with this subaccount.

Step 4: Open the shared campaign to begin editing. Once you begin to edit, it will also appear in your Drafts tab.

Step 5: To deploy this campaign (if it was shared from an internal subaccount), you will need to add in the opt-out footer. In another tab or window in Emma, click on the Shared tab within the Campaign section. There you will see the Shared Campaign named ‘EXTERNAL-FOOTER-MUST-HAVE’.

Step 6: Open the ‘EXTERNAL-FOOTER-MUST-HAVE’ campaign.
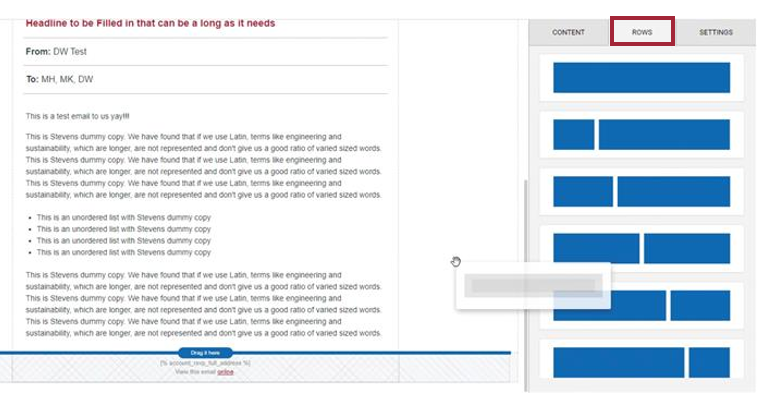
Step 7: Return to the tab you were using in Step 4 (Share Campaign in External Subaccount). Click on the row tab in the right-side option menu and add a single row by dragging it right above the footer.
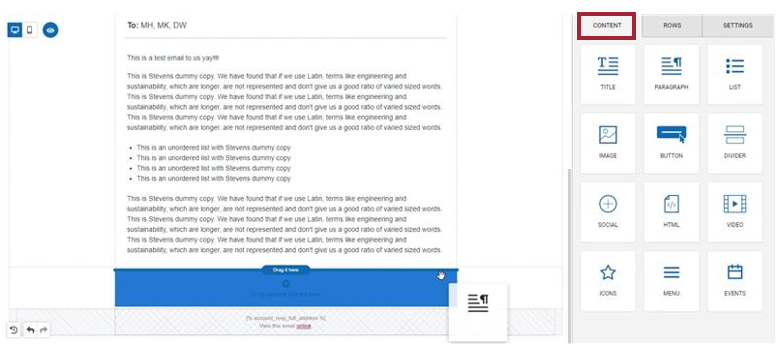
Step 8: Now click on the content tab in the right-side option menu and add a paragraph by dragging it into the row you just added.
Step 9: Copy and paste all the text from ‘EXT-FOOTER-MUST-HAVE’ into the paragraph container.
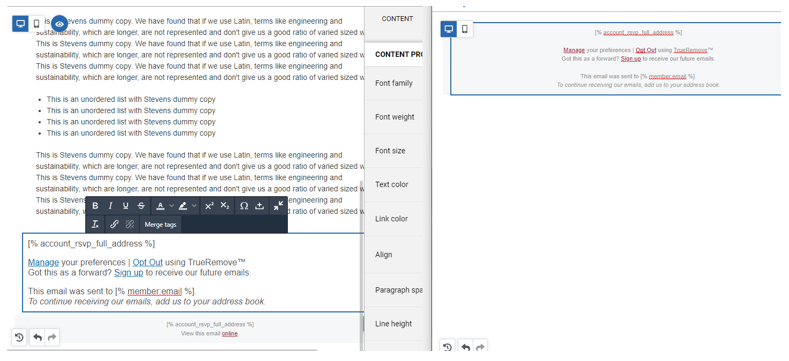
Step 10: Before sending the campaign for deployment you will need to style the row and text to match the other footer messages.
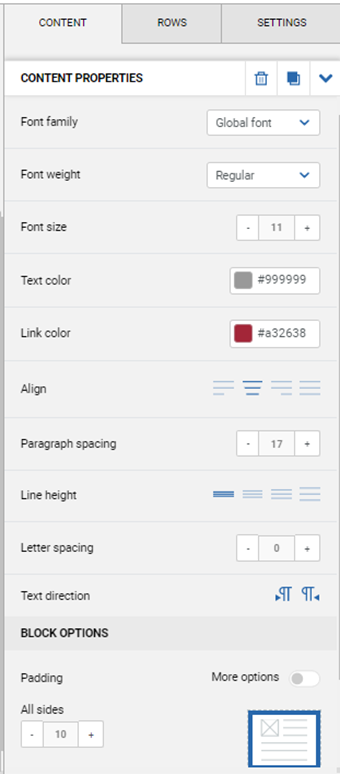
Edit the Paragraph (Content tab)
- Font is Arial regular 11pt #999999 centered
- The link color is #a32638
- Line height is second closest
- Padding on all sides of the block is 10
Edit the Row Background (Row tab)
- Background color of the row is # f6f7f8
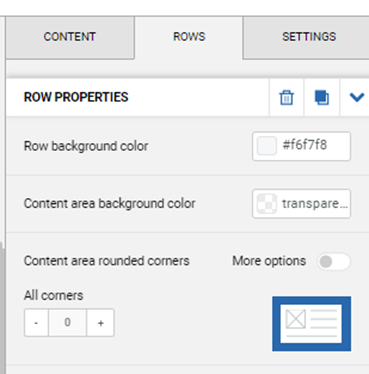
Step 11: Be sure to save your campaign and follow your department processes for getting approval to deploy the two campaigns to the intended audiences.
Experiencing an issue or need additional support? Contact our OneIT Team by