How to Set Up a New Device in Okta Verify
Learn how to set up a new mobile device with your Stevens Okta account.
Before you start:
- In order to take this action you will need access to the original device you set up Okta Verify on.
- If you do not have access to the device you originally used for Okta Verify please contact Client Support Services at support@stevens.edu so that they may reset your account.
- If you have not previously enrolled in Okta before, visit the How to Enroll in Okta Knowledge Base article for step-by-step instructions.
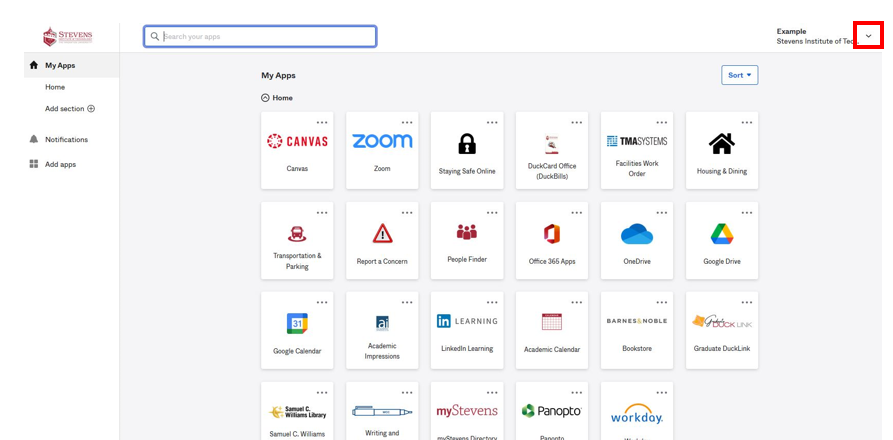
Step 1: Visit the Okta portal and log in with your Stevens username and password. Once you have logged in, select the arrow below your name on the top right.
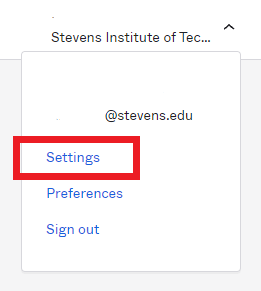
Step 2: Then select Settings.
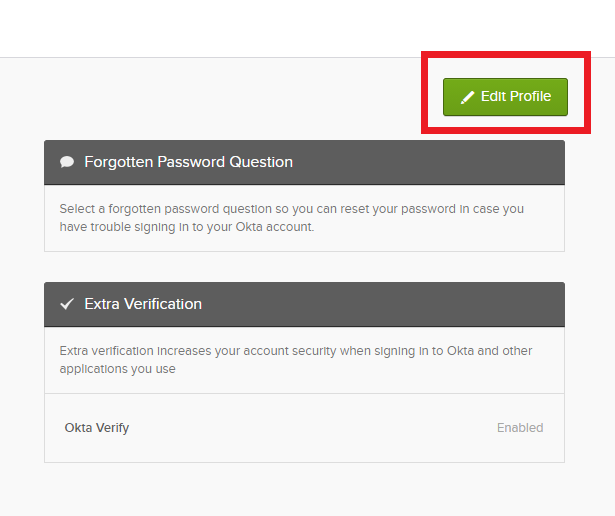
Step 3: Select Edit Profile.
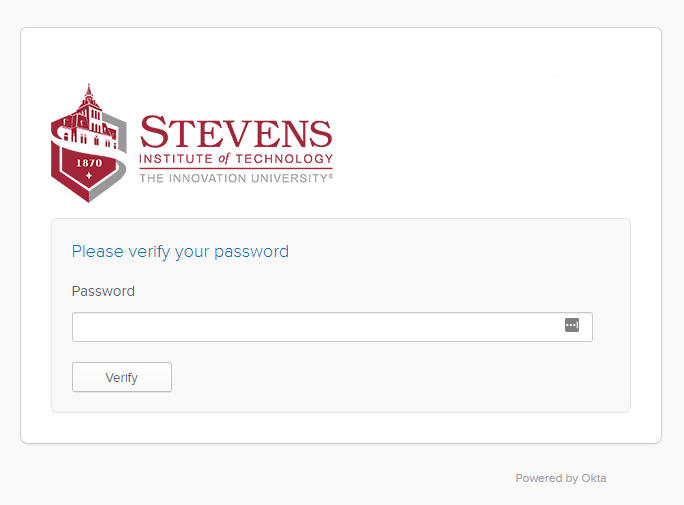
Step 4: Okta will ask you to verify your Stevens password.
Step 5: You will then need to send a push to your previously set up device.
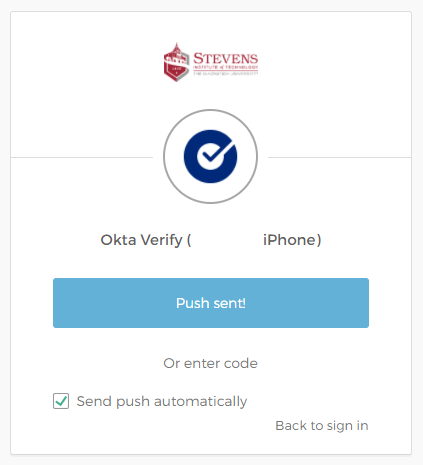
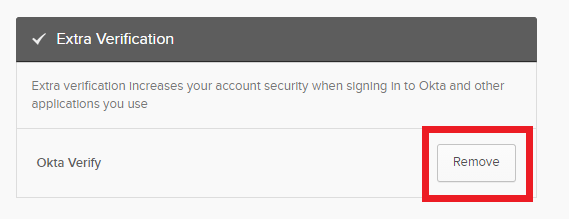
Step 6: Please confirm your identity on your previously set up device. Then select Remove, in order to remove the device you wish to no longer use.
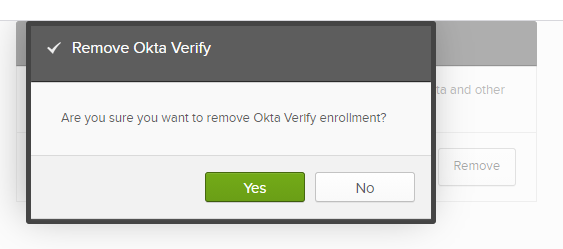
Step 7: Confirm that you would like to remove Okta Verify from this device by selecting Yes.
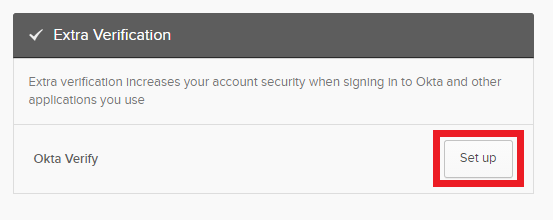
Step 8: Once you have removed the device, select Set Up to enroll your new device.
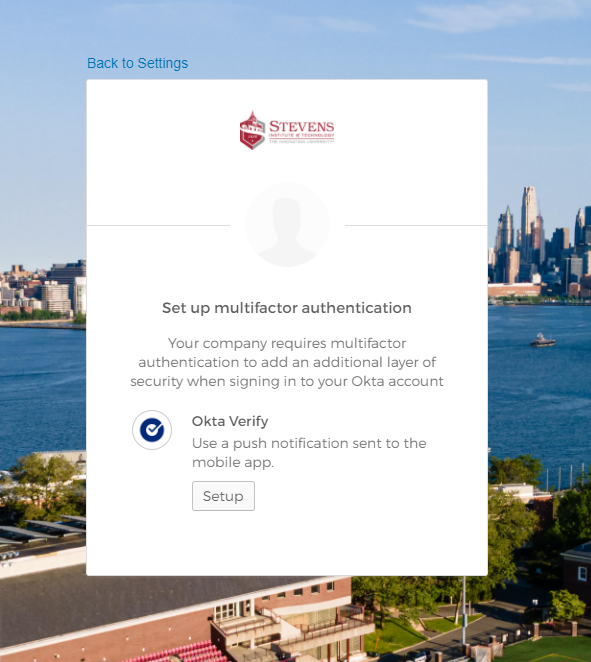
Step 9: You will now be prompted to setup your new device with Okta Verify.
Experiencing an issue or need additional support? Contact our OneIT Team by